
Crossdresser Photo Editing
Remember Eve
Do you remember a gal who lived in a lovely garden that got tempted into gnawing on some apple? I think her name was "Eve". As I recall...she lived with some stud named Adam. *Smile* Eve got tempted... Guess what? You'll face temptation too...with your photos. What temptation will you face. Namely, to adjust them too much.
My advice? Don't do it.
Here's why...
The very best thing that can happen to a new gal is that she not become highly skilled at graphics programs. Why? Because you'd be amazed how many gals photo's you've admired on-line - look nothing like them. Girls that do this tend to isolate themselves. They know they look very little like those photos people see of them - causing them to be hesitant in subsequently meeting others. The only way you'll look better is practice. Do you want to become an expert at transformation or in digital editing?
Don't miss out on becoming pretty the old fashioned way. Do so - and you'll end up far more beautiful - both inside and out. **kiss**
Additional Chapters in This Section Include:
Crossdresser Photo Tips
MTF Photo Guide
Crossdressing Photo Hardware
MTF Photography Tips
Editing Your Crossdresser Photos
section overview
Here I'm going to show you how to:
- The importance of properly naming your photo files
- A standard process for editing your photo shoot
- Ideas for making your pictures look better
- A few words on protecting your images
organizing your photos
My photo files are buried in my computer under a heading which means nothing to anyone but me. I did this early on - when I was concerned others might accidentally access my CPU - and come across pictures of me in a dress.
Although that's no longer a personal concern *laugh* - I still keep my photos buried in the same old spot. Old habits - die hard.
Food for thought...I'd suggest you keep the originals - even in a separate folder or disk. No matter how bad you think you look or how dark a photo ended up - resist the temptation to delete it. You'll be amazed how your photo editing skill might be able to "save" that photo in the future. Likewise - don't edit the originals - don't adjust the light, etc. I ruined some excellent early photos because I was not yet skilled in adjusting the lighting, etc. If I had simply worked with copies - I'd still have them.
Know the biggest reason not to delete those images? To offer proof to you - on just how far you've come. I trashed many early pictures out of female shame. I'd give anything to own more of them now. Amazingly - they'll end up making you feel great - about you - over time! ((hugs))
naming your photo files
This might sound silly to a person just taking their first photos but you'd be amazed how many pictures you might end up shooting over the course of your femme existence. Your first inclination will be to name your photos by description. I named them with descriptive labels such as red-dress-smiling or lingerie-21. However, I think you'll find you'll end up with more photos than descriptors can cover.
Over time - none of this works. I now name my photos by numerical date. I wish I'd done it earlier - it's cool being able to track your progress over time - and date codes make that a cinch.
I developed a simple means to name my photo files - where I never end up with duplicates. I thought you might find it useful.
- I begin by creating a sub-folder in my photo file with the shoot date. Thus, a set taken today would be in folder 02-07-26 or (02=year; 07=month; 26=day) also known as...July 26th, 2002. If these pictures were taken at a special event or gathering - I might include a tickler note at the end of the file for future reference - (i.e. SCC) - but I don't add such letters to the file names. Just seems a waste of time.
- I subsequently create a subfolder I call originals - and I load all the new images from my camera directly to this sub folder. Also, I create another sister folder called "cuts" - when I put images I cut out from these originals.
- As I cut & resize each photo - I name them by this same date code. Thus the first new cut photograph is named: "Ren-2726-01.jpg. These new pictures are saved in the "cuts" file.
- If I edit that picture - or cut a few different looks from the same photo - I name them by that variation - i.e. - Ren-2726-01a.jpg or Ren-2726-01b.jpg.
- I sometimes create additional folders to house my favorite shots - if I took a large number of photographs - in order to select those I want to include at my web site - but I usually delete these soon afterwards to save space on my hard drive.
- At the close of a year - I put all my photos into a single year folder for easy future reference.
If you end up taking a lot of photos over the years - you might want to try a similar filing system as well. Just don't forget to back them up now & then. I can't begin to tell you the number of gals that lost all their pictures from a CPU crash...((hugs))
editing your shoot
I follow a fairly simple process in editing my pictures. I'm quite certain many of you use better procedures than me - but here's what I do...
Step One - I cull through my photographs and remove those I consider worthless. I usually don't delete them - I just create another subfolder from the original file - and name it marginal. The woman in me - simply refuses to name any picture bad. *Laugh*
One reason I don't delete these images is that sometimes I'll subsequently review them - and look at the picture differently. Likewise, it's worthwhile to later review these less than ideal photos and ask the question - what went wrong? There's no reason to keep repeating the same mistakes. ((hugs))
Step Two - I repair any problems with red eye or minor zits on the original photograph. I don't edit any other features (lighting, etc) in the original photo beyond this - as I discovered I might not want those changes - included in future uses of the photo.
Once you've saved a photo change - it's pretty much a forever thing. Besides, I'm a packrat at heart - I never throw anything away...*Laugh*
Step Three - I cut what I think will be the pose I prefer for this photograph. I'll sometimes cut out a larger version of such a picture - just to get a better subsequent look at the photo. I'll subsequently consider b & c versions as I run through the images.
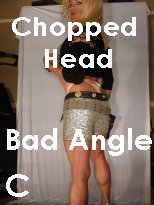
If you're just starting in the world of photos - try getting outside the box" now & then in the selection of your cuts - even if you don't use them. Consider creating five images of each picture (i.e. cut away the top of your head, half your body, etc.) - just to learn where good photos can be found in a picture.
Oh, you get the idea...*Laugh*
Step Four - I cut to the chase on the portion of the pose I'm planning to use. At this point - I resize the photograph to a proportion I'll use in my :photo gallery. Subsequent to this - I adjust the lighting as needed. If you adjust the lighting prior to resizing - you'll usually have to repeat the process as the clarity changes with the image size.
Step Four - I now use test the mirror & unsharp mask features of my photo editing software to see if they'll enhance the image. You can usually tell rather quickly if these tools add to the quality of the photo - or detract from its appearance. Again - watch out for facial contorting from the mirror feature .
Step Five - I add my name - and call it a wrap. I usually do each of these procedures by step versus by completed photo. Thus, I resize all my photos - then come back & adjust all lighting, etc., etc. Why? I've found most pictures from the same shoot - require almost identical adjustments to lighting, etc. Thus, my skill in improving each photo stays best - if I go ahead and adjust the lighting in each photo sequentially - versus waiting until I've completed the edit procedures on individual pictures.
Of course - I'm a blonde at heart. You brunettes - just go ahead and do it as you see fit...*Laugh*
creative editing
There's a lot more to a great picture than a pretty face. Here we'll explore some creative ideas for editing your pictures.
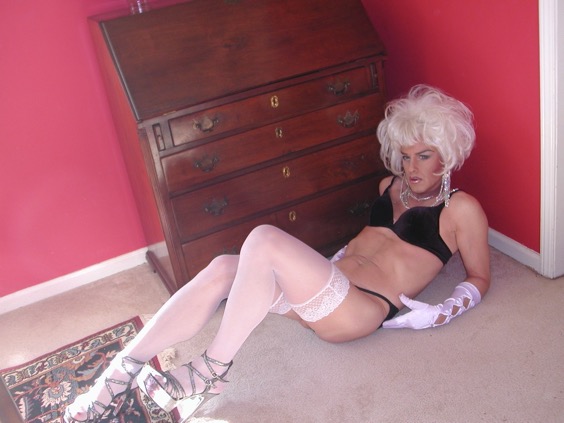
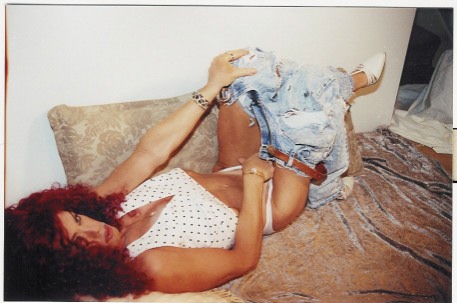
buried treasure

Lets face it.
None of us - take great photos - every time. You'll be amazed at how good certain photos come out - and disappointed in the results from others.
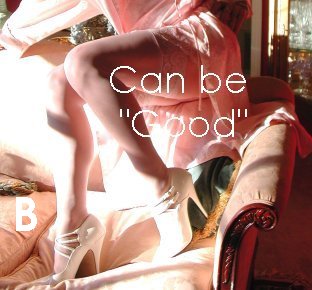
Here's a bit of advice - don't give up hope on those bad photos just yet!! If you'll take the time to analyze each of your pictures, you'll often find hidden treasures just begging to grace your web page with a little help from a graphics program. I can't begin to tell you the number of photos I would have tossed early on - that I now find useful.
Take the time to test - cutting out various sections of each photograph. Cull a head shoulder shot, full body, waist-up, legs & feet, etc. - from each new picture to enhance your skills in spotting good pictures - within a photograph.
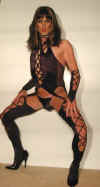
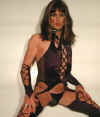
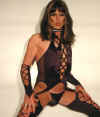
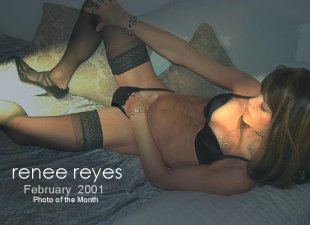
I've included a couple of examples that illustrate this point. Quite frankly, I wasn't pleased with any of the photos I took in my pink lingerie. I had been out all night partying - and was still more than a little drunk when the camera got rolling. It showed. I had neither the grace or sultry look I prefer to exhibit. However, as I later reviewed these pictures in greater detail, I found a few I thought were pretty hot.
I'm sure you will - as well.
Take the time to examine all your photos thoroughly. Sometimes - you'll discover some of your best photos - are buried inside your bad ones.
your picture can tell a thousand words
I recognize most of you have no where near the opportunities as yours truly to shoot photos. Thus, if you're like most gals - you'll spend a great deal of time adjusting & playing with those you already shot.
While I'm not a big fan of you doctoring images to cause them to not look like you - there's a number of more legal options that can add variety & spice to any new set of pictures.
These include...
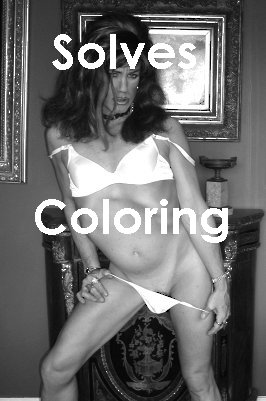
Creating Black & White Pictures - This can be extremely helpful when most of your photos have red eye - and fixing them all seems like a wasted effort. Likewise, black & white tends to be more forgiving in the smoothness and appearance of your skin.

Adding Captions - You can Add unique captions befitting the imagery of a picture - and add a whole new meaning to what that photo "says" to the observer.
Unique Lighting - There are some photo editing programs that allow you to selectively add selective light to a picture. This can be a powerful addition to an otherwise staid photo. I don't invest this time - it's too simple for me to simply re-shoot a group of pictures. However, if I were more limited in this regard - I'm sure I'd play more with this option.
Merged Images - Another trick you can consider - is merging the image into alternative backgrounds. This will require a bit more learning with your graphics program - but I've seen gals create stunning images of a beach behind themselves, etc.
Again, these are just a few ideas. I'm sure you'll come up with others. I shoot so many pictures that I do almost nothing special with them. I'm figuring this will be a great project for me when I'm an old & gray hag - and nobody wants to look at recent pictures of my mug. I plan to sit in a retirement home in front of my CPU in a wheel chair - and create arsenals of new photos - to use in flirting with cute boys all over the world...*Grin*
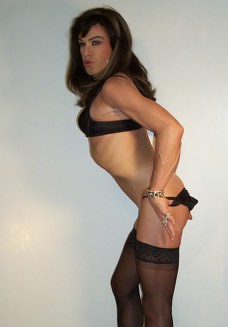
Mirror, mirror on the wall...
Another feature I use often is the mirror adjustment. This step creates a total reversal of the existing image - and is a powerful tool for editing your pictures.
The reason this is valuable to some photos - is the nature of how people look at photographs. They observe - the same way they read...from left-to-right.
Thus, if the best part of a photo is your legs - and they're presently situated on the right side of the image - you can easily mirror them to the opposite side - and create a more appealing picture - with the click of a button.
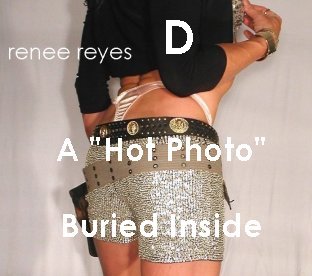
Notice how I mirrored my behind in this photo. Your eyes tend to start from the left - and end up looking exactly where I want them. Get the idea? I knew you would. ((hugs))
One warning - sometimes, this feature causes your face to subsequently look a bit contorted - and not worthwhile. Test it on your images before final editing - and before you add your "name" (i.e.. renee reyes) to a picture.
If you wait before adding your signature - it'll reverse those words as well. *Smile*
Finally - I often try the feature known as "unsharp mask" on many of my photos. This tool can really bring out the gleam in your eyes in certain photos. It requires a bit of practice and study. I discovered it after doing some on-line research on how to take better photo". It's worth the investment of your time - even for those of us that absolutely hate reading instructions. *Grin*
Signing off
Most gals include their femme name on their pictures - if for no other reason than to protect the image from someone claiming to be them - with a photo. You can also include a copyright notice on each picture - if you feel compelled to do so.

One photo challenge you might face along the way is people stealing your photographs for use in personal ads, chat rooms, promotional material - name it.
Friends send me links of my pictures being used for on-line escort services - porno sites - personal ads - the gamut. I've had magazines include my pictures without notice or compensation.
Unfortunately, a lot of these pirates are from Europe - located in certain countries where laws protecting copyright of Internet images are almost non existent.
I've dealt with a number of on-line impostors over the years. A few - actually sounded fairly adept at duping me in conversations - quoting my web page, etc.
Personally, I think it's a bit funny - impersonating a female impersonator. If someone's life is that boring - more power to them. *Laugh*
You can contact the ISP where the impostor is located and sometimes get your false image removed. However - other times - nothing can be done. I've gotten to the point I rarely even follow up on such issues. If someone is that desperate - they probably need the pictures a lot more than I do.
Try not to worry over this kind of crap. ((hugs))
published pictures
If you'd like to create a few printed versions of photos from your digital pictures - it's very easy to achieve.
First - you can send these images to any one of a range of on-line photo processing services and they'll get them out to you within days. I've used Yahoo photo services - and they did a great job.
You can also purchase print quality paper and produce your own from a color printer. Even Wal-Mart now carries a variety of such paper - and the results are surprisingly good. I keep a few such photos in my calendar to share with friends now & then.
What can I say...I'm a ham - sue me! *Grin*